
Microsoft Dynamics 365
This guide connects Microsoft Dynamics 365 to Live Hub. Complete the following steps:
- Create a SIP connection in Live Hub
- Create a workstream in Microsoft Dynamics 365
- Connect the workstream to Azure Communication Services
- Connect Azure Communication Services to Live Hub through Direct Routing
- Verify the Live Hub domain
- Configure the Direct Routing SBC in your Azure Communication Services account
- Provision phone numbers in Microsoft Dynamics 365
- Set up inbound and outbound calling in Microsoft Dynamics 365
- Configure Live Hub routing rules
Create a SIP connection in Live Hub
To create the SIP connection that represents your Microsoft Dynamics 365 account:
-
Log in to Live Hub.
-
In the Navigation pane, select SIP connections, and then click Add new SIP connection.
-
Select the General tab:
-
Under General:
- In the 'Name' field, enter a unique SIP connection name (for example, Dynamics 365).
- From the 'Provider type' drop-down list, select Contact Center.
- From the 'Provider' drop-down list, select Microsoft Dynamics 365.
-
-
Select the Incoming tab:
- Select the 'FQDN (Request-URI)' check box, and then copy the 'SIP connection FQDN' value that appears. You need this value when you configure Direct Routing in Azure Communication Services.
-
Click Create.
Create a workstream in Microsoft Dynamics 365
In Microsoft Dynamics 365, a workstream is a container used to enrich, route, and assign work items. The workstream is associated with a channel, such as live chat, voice, or case.
To create a workstream in your Microsoft Dynamics 365 account, refer to the Microsoft Dynamics 365 documentation.
Connect the workstream to Azure Communication Services
Microsoft Dynamics 365 uses Azure Communication Services to connect a workstream to a voice channel. This capability establishes the connection between Microsoft Dynamics 365 and Live Hub.
To connect your Microsoft Dynamics 365 workstream to an existing Azure Communication Services instance, refer to the Microsoft Dynamics 365 documentation.
To create a new Azure Communication Services instance, refer to the Microsoft Dynamics 365 documentation.
Connect Azure Communication Services to Live Hub through Direct Routing
To create a Direct Routing connection between Live Hub and the Azure Communication Services instance created in the previous step:
-
Go to the Azure Communication Services instance that you created in the previous step.
-
In the Microsoft Dynamics 365 admin center's navigation pane, select Phone Numbers.
-
In the top-level menu, click Advanced.
The Manage Azure Communication Services dialog opens.
-
Click the Open Azure link.
-
Alternatively, open the Azure portal, enter
Communication Servicesin the search bar, and then locate your Azure Communication Services instance by name.
-
-
Open the Direct Routing page.
-
On the Domains tab, click Add domain:

-
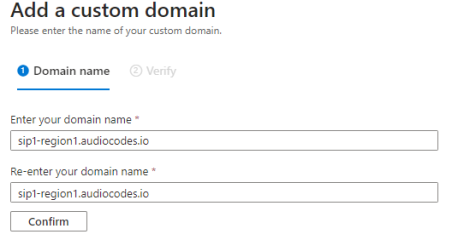
Calculate the Live Hub base domain by removing the first element from the 'SIP connection FQDN'. For example, if the FQDN is
fjoigfgmeuol.sip1-region1.audiocodes.io, the Live Hub base domain issip1-region1.audiocodes.io. -
Enter the Live Hub base domain, and then click Confirm.
-
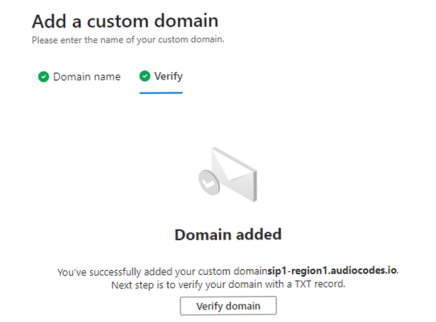
Click Add, and then wait for the domain to be added.
-
Click Verify domain.
-
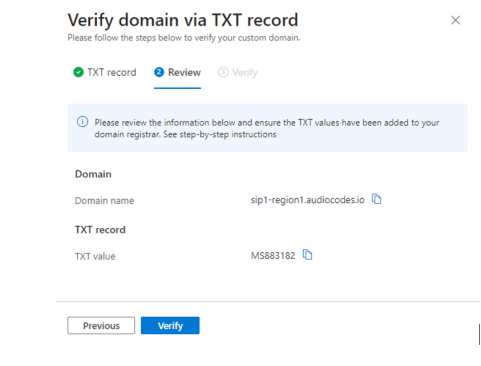
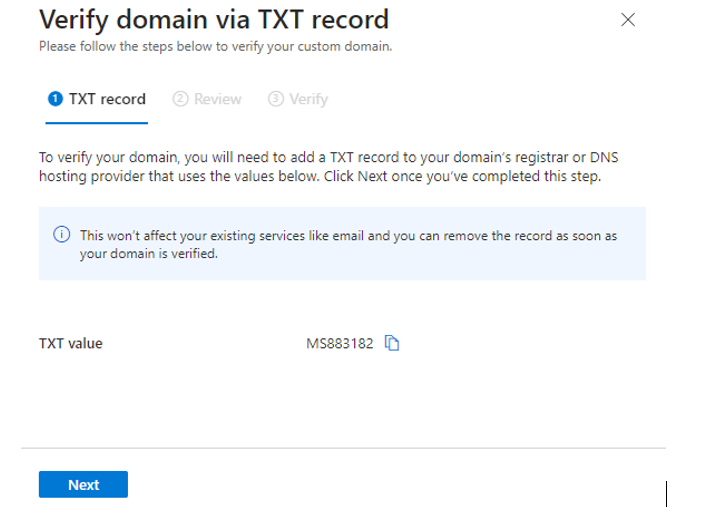
On the TXT record page that appears, copy the TXT record value for domain verification. Do not click Verify. Instead, continue with Verify the Live Hub domain.
Verify the Live Hub domain
To verify the Live Hub domain for specific Azure Communication Services instances:
-
Log in to Live Hub.
-
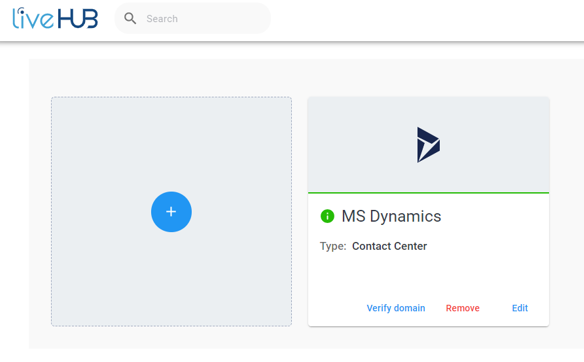
In the Navigation pane, select SIP connections, and then locate the Microsoft Dynamics 365 SIP connection that you created earlier.
-
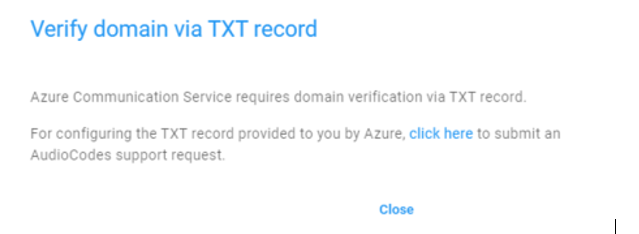
On the SIP connection card, click Verify domain. You are prompted to submit a support request for domain verification.
-
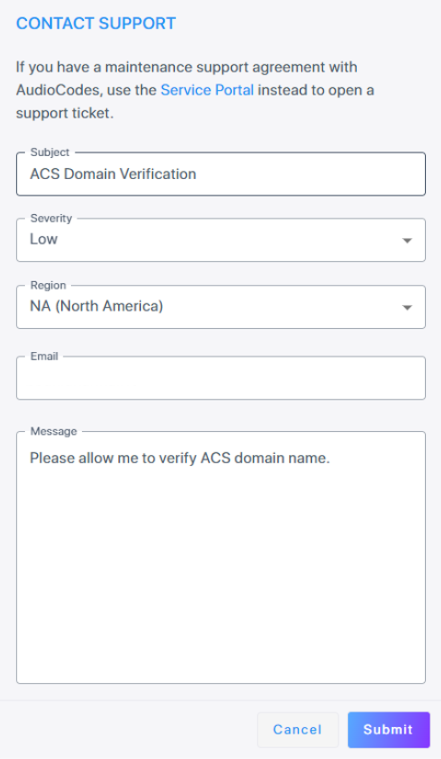
Click the provided link to submit a new support request.
-
In the 'Subject' field, enter ACS Domain Verification.
-
In the 'Message' field, state that you are requesting domain verification.
-
Click Submit.
-
-
Wait for a response from AudioCodes support confirming that domain verification is enabled for your account.
-
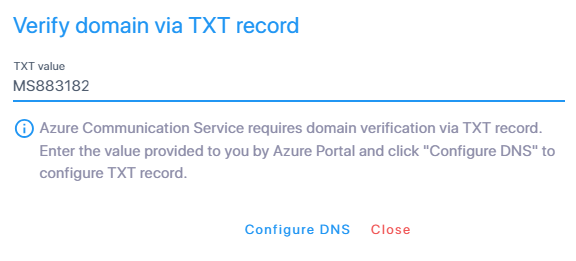
On the SIP connection card, click Verify domain again. You are prompted to enter the TXT value.
-
Enter the TXT value, and then click Configure DNS.
-
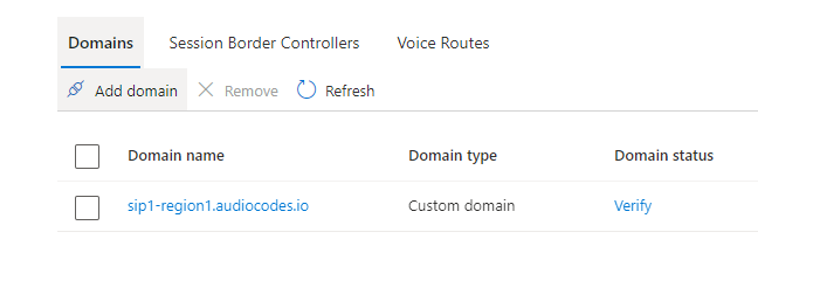
Open the Direct Routing page.
-
On the Verify domain via TXT record page, click Next.
-
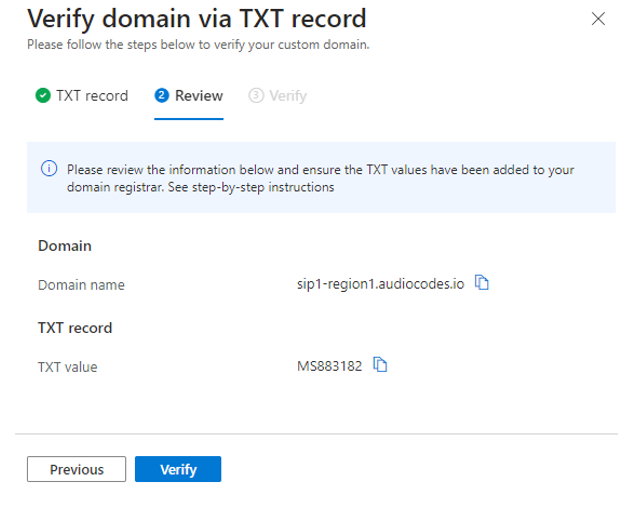
Click Verify.
-
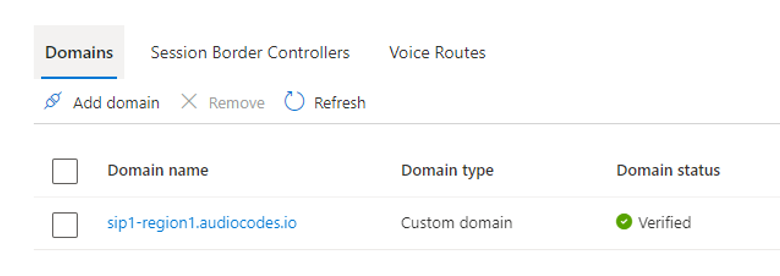
Wait for Azure Communication Services to complete domain verification. When that happens, the domain status changes to Verified.
Configure the Direct Routing SBC in your Azure Communication Services account
To configure the Direct Routing SBC in your Azure Communication Services account:
-
Log in to the Azure portal.
-
Go to your Azure Communication Services instance.
-
Open the Direct Routing page.
-
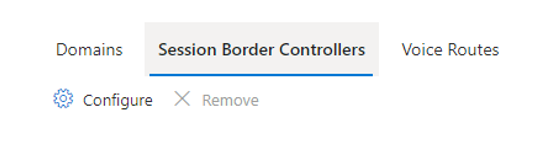
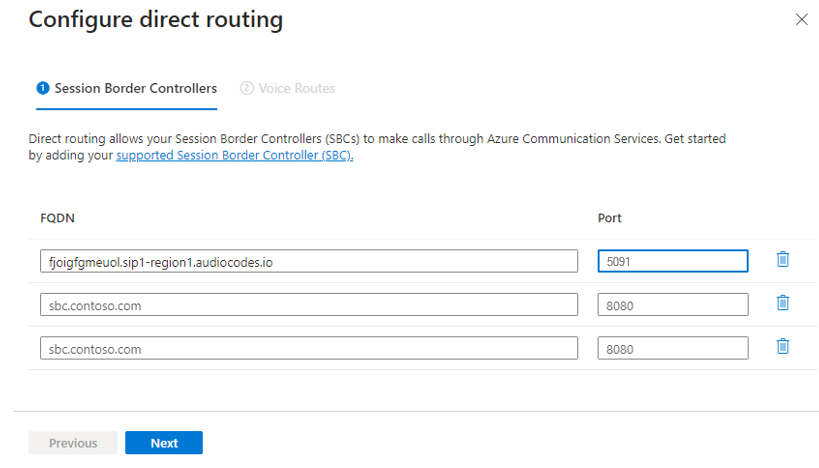
Select the Session Border Controllers tab, and then click Configure.
-
On the Session Border Controllers tab:
-
Configure the first line:
- In the 'FQDN' field, enter your 'SIP connection FQDN' value, for example
fjoigfgmeuol.sip1-region1.audiocodes.io. - In the 'Port' field, enter
5091.
- In the 'FQDN' field, enter your 'SIP connection FQDN' value, for example
-
Click Next.
-
-
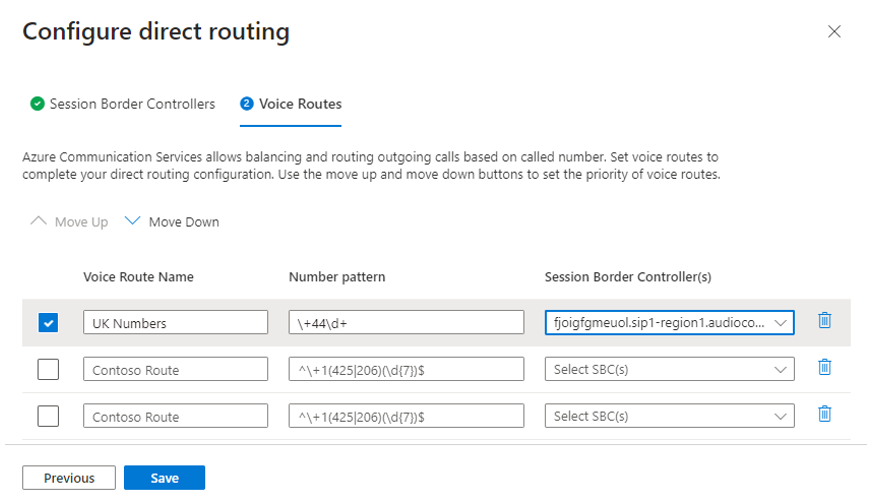
On the Voice Routes tab:
-
Configure the voice routes that Azure Communication Services routes to Live Hub. For the Session Border Controller, select the 'SIP connection FQDN' value that matches the first line configured on the Session Border Controllers tab.
-
For example, use the following configuration to route all calls starting with the
+44prefix to Live Hub:- Name: LiveHub
- Number pattern:
\+44\d+ - Session Border Controller:
fjoigfgmeuol.sip1-region1.audiocodes.io
-
Click Save.
-
-
Wait up to 1 hour for your configuration to propagate across all Azure Communication Services platform elements.
Provision phone numbers in Microsoft Dynamics 365
Every phone number used for calling between Microsoft Dynamics 365 and Live Hub must be provisioned in Microsoft Dynamics 365 as a phone number.
If you use Live Hub to connect Microsoft Dynamics 365 to a SIP trunk provider, allocate phone numbers from your SIP trunk provider before you complete this step. Alternatively, use the PSTN numbers that Live Hub itself provides: allocate them on the Live Hub Phone numbers screen, and then complete this step.
To provision a phone number in Microsoft Dynamics 365:
-
In the Microsoft Dynamics 365 admin center's navigation pane, select Workstreams.
-
Select the workstream that you created in the previous steps and connected to Azure Communication Services.
-
Click Set up voice or Add voice channel. The Voice Setup dialog opens.
-
In the 'Name' field, enter the channel name, and then click Add phone number. The Phone Numbers dialog opens.
-
Click Advanced. The Manage Azure Communication Services dialog opens.
-
Under Bring your own number via Azure Direct Routing, click Add number. The Add Your Own Phone Number dialog opens.
-
Configure the phone number properties:
- In the 'Phone Number' field, enter the phone number in E.164 format without the
plus prefix, for example
443031237300. - Select an existing carrier from the drop-down list, or create a new one.
- From the 'Country/Region' drop-down list, select your country or region. If your country is missing, select Other.
- For 'Number Type', select Toll-free or Geographic.
- For 'Calling Plan', select Receive calls, Make calls, or both.
- Click Add Number to add the phone number.
- In the 'Phone Number' field, enter the phone number in E.164 format without the
plus prefix, for example
-
Wait until the phone number is provisioned and its status changes to "Ready".
-
Repeat these steps for every phone number that you plan to use.
Set up inbound and outbound calling in Microsoft Dynamics 365
Finally, set up inbound and outbound calling in Microsoft Dynamics 365 using the provisioned phone numbers.
To set up inbound calling, refer to the Microsoft Dynamics 365 documentation. In the Configure a voice channel section, select the phone number that you provisioned in the previous step. Skip the Acquire phone number section, which does not apply to numbers provisioned through Azure Direct Routing.
To set up outbound calling, refer to the Microsoft Dynamics 365 documentation. In the Configure phone numbers for outbound calling and Assign personal numbers to agents sections, select the phone number that you provisioned in the previous step.
Configure Live Hub routing rules
Complete the setup by configuring routing between Microsoft Dynamics 365 and your SIP trunk, your phone numbers, or both, on the Routing screen of Live Hub. See Routing rules.